Summary:
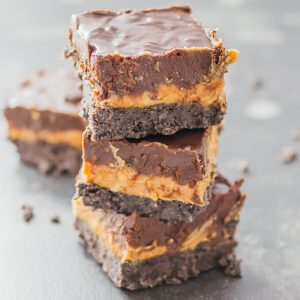
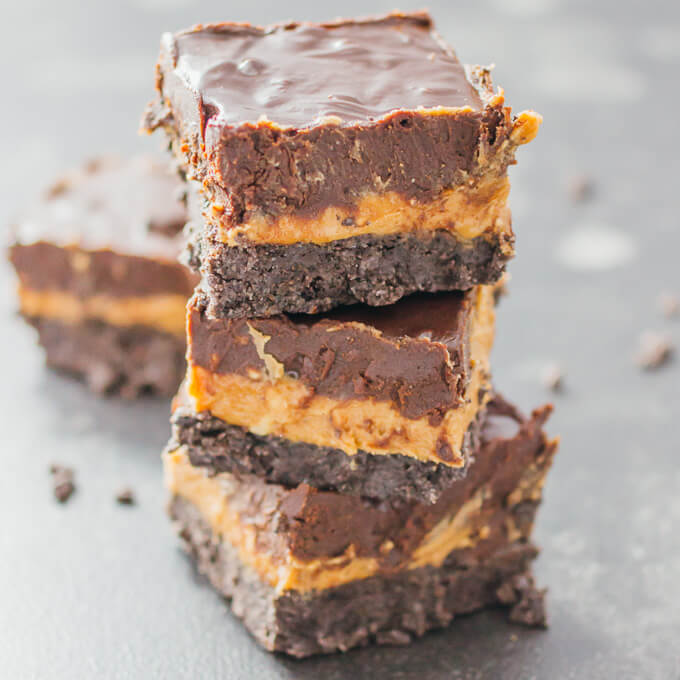
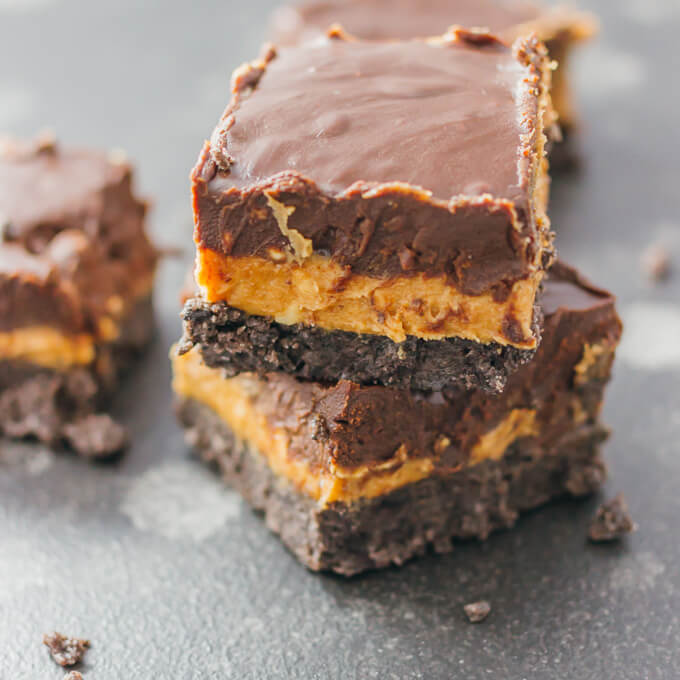
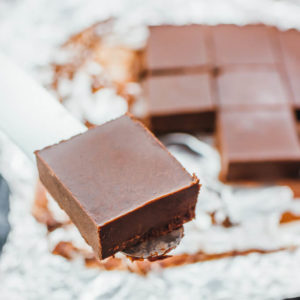
Enjoy this 6-ingredient summertime treat featuring three delicious layers: a crushed Oreo crust, a thick and creamy peanut butter filling, and a rich chocolate topping. This is a no-bake recipe — perfect to make on a hot day.
INGREDIENTS
Oreo Crust:
- 13-ounce package oreo cookies (Note 1)
- 6 tablespoons butter
Peanut Butter Filling:
- 1.5 cups crunchy peanut butter (Note 2)
- 1/2 cup powdered white sugar
- 4 tablespoons butter
Chocolate Topping:
- 1 cup
semi-sweet chocolate chips - 1/2 cup heavy whipping cream
- 2 tablespoons crunchy peanut butter
INSTRUCTIONS
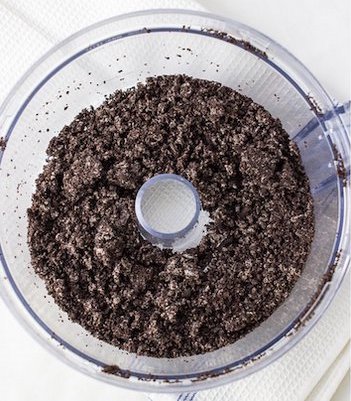
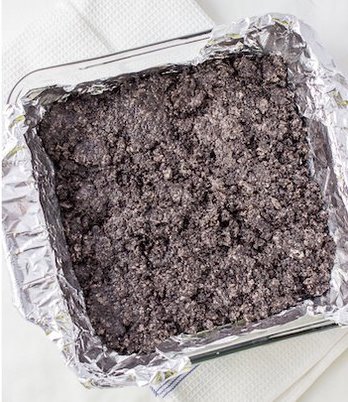
- Make Crust: Line
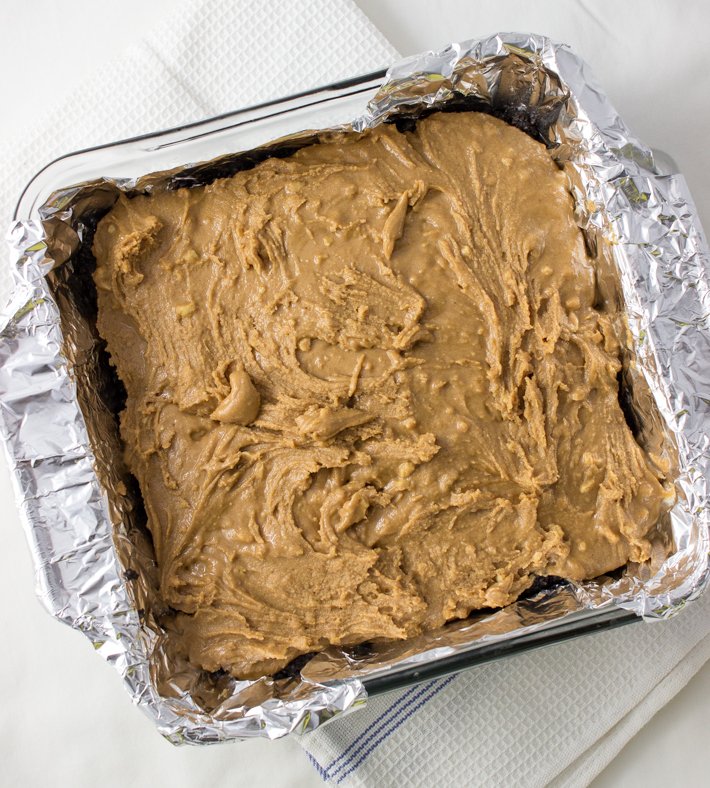
8×8 inch baking dish with foil, and grease sides and bottom with butter. Add Oreos tofood processor and pulse until finely crushed. Melt butter in large mixing bowl in microwave. Add crushed Oreos to bowl and stir with melted butter until well-mixed. Transfer to prepared baking dish, forming flat crust by pressing down along bottom of dish. Place baking dish in freezer. - Make Filling: Melt butter in large mixing bowl in microwave. Stir in peanut butter and sugar until well-mixed. Distribute mixture over chilled crust in baking dish. Return to freezer.
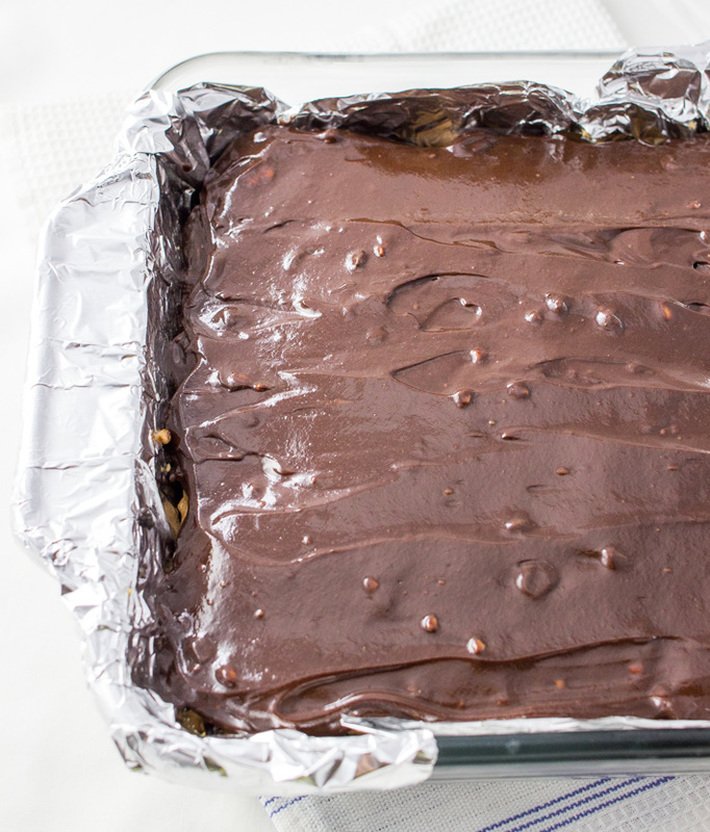
- Make Topping: Add chocolate chips and peanut butter to large mixing bowl. Bring heavy whipping cream to simmer in small saucepan over medium-low heat. Pour heated cream over chocolate chips and peanut butter, and stir until completely smooth. Pour chocolate mixture over chilled filling in baking dish, spreading evenly. Cover and refrigerate overnight or at least a few hours.
- Serve: Lift up sides of foil to remove from baking dish and transfer to cutting board. Cut into 16 square bars, and serve (Note 3).
NUTRITION
| Makes 16 Servings |
| Amount Per Serving (1 bar): |
| Calories 420 (66% from fat) | |
| Total Fat 31g | 48% |
| Saturated Fat 12g | 58% |
| Cholesterol 28mg | 9% |
| Sodium 180mg | 8% |
| Net Carb 30g | |
| Total Carb 33.5g | 11% |
| Dietary Fiber 3.5g | 14% |
| Sugars 21g | |
| Protein 8g |
PHOTOS
Love these, they look so delicious!
How make it without any chocolate in the recipe?
Can you use creamy peanut butter do you think?
Yes, that should be fine. I definitely prefer this with crunchy, but creamy will also work 🙂
Where have these been all my life?! I made them last week and they were perfect! Thanks for the great recipe!
Oh my GOSH these look beyond amazing!
Thanks so much for the recipe! These are insanely rich and I’d definitely make them again. My top layer of chocolate didn’t set quite as nicely as yours and made it hard to cut because it was pretty liquid-y (kind of the consistency of custard?). Not sure why it ended up so different. When I make it again, will probably add more chocolate chips to the heavy cream.
You can try leaving it in the freezer longer before adding the top chocolate layer (at least 15 minutes), to make sure everything has hardened before adding the top layer. After adding the top layer, you can leave it in the refrigerator longer so that it has time to set before you cut into it (I recommend 1 hour in the recipe but you could try a few hours). Make sure you’re using heavy whipping cream and not a substitute. Hope that helps!
They already look delicious to me
These looks so yummy!
I don’t think I’ve every seen a no-bake something that looks this stinking beautiful. I cannot wait to try this out!